
quality. service. price.
Two Stroke Top End Replacement
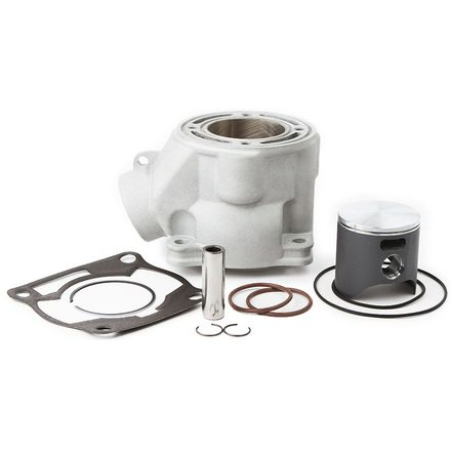
Top End Replacement tips
- If your engine has power valves, now is a good time to clean the entire assembly and check for damage. Be sure all gasket mating surfaces are clean and free of gouges and old gasket material. NEVER re-use old gaskets or use silicone!
- Stuff a clean shop rag in the crankcase so nothing can fall in.
- Clean your new piston and cylinder with hot soapy water. Wipe the bore with a clean, white, industrial paper towel until all traces of dirt are gone. Wipe in the direction of the hone marks.
- Put the first wrist pin clip into the pin bore. Make sure that the clip is seated in the groove and the openings of the clip are facing up or down. This is a common mistake and will cause severe engine damage if not done correctly.
- Oil the top end bearing, pin bore, lower crankshaft bearing and piston pin with two-stroke oil. Don't save money here! Use the good stuff!
- Place the top end bearing in the connecting rod. Slide the pin into the side of the piston without the clip. Push the pin through the rod and bearing--DON'T hammer it! Be sure the arrow on the top of the piston is pointing toward the exhaust. Now install the last clip into the piston pin bore.
- Check both clips and be sure they are seated.
- Check the ring end gap. The gap should be .004" per 1.000" of bore.
- Install the rings with the NA or N marks up. You will see these marks where the ring opens. Line the end gaps up with the pins in the back of the piston. If the pins are in front, the piston is on backwards. If you made this mistake, don't make another. Never re-use the old clip. You need to get a new clip or you take the chance that the old one will fail!
- Lightly oil the piston skirt and the cylinder with two-stroke oil.
- Remove all oil from the cylinder mating surface and install your new base gasket. Remove the shop rag from the crankcase.
- Squeeze the rings together with your fingers and GENTLY lower the cylinder over the piston. DON'T twist the cylinder on--this may break the rings. Never force the cylinder down. If the cylinder is hanging up, your rings are not lined up or the cylinder is not going on straight. Once the cylinder is in place, torque the nuts to the proper spec.
- Install your new head gasket and cylinder head. Tighten in a cross pattern in small steps. This prevents distortion. Install all the other components. Be sure to re-torque the head after the first warm-up. Let the engine cool down completely before you re-torque.
Example: your cylinder has a 2.500" cylinder bore 2.5 x .004 =.010
Your ring end gap should be no smaller than .010". Gently push the ring into the cylinder bore so it is parallel and about 1" below the head surface. Use a feeler gauge to measure the end gap. Larger is OK, smaller has to be corrected. Use a flat file to remove material from the ends of the ring if needed.
All bikes are different. You should consult a service manual. These are not instructions and should be used in conjunction with your service manual.
860 230 5003
© 1983-Present by Ken OConnor Racing. All rights reserved.